Create concrete-look surfaces with sustainable components
Create concrete-look surfaces with sustainable components
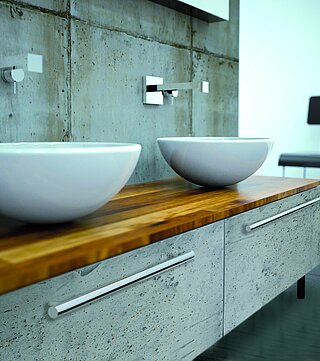
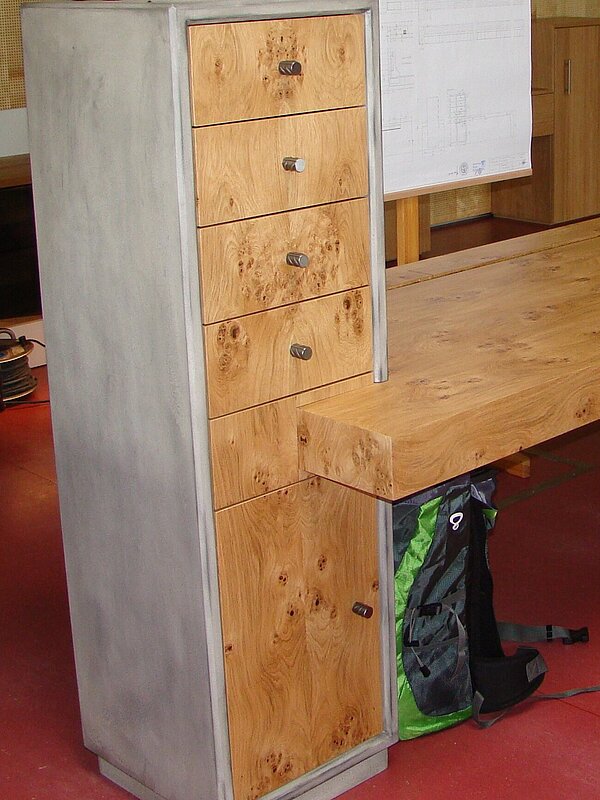
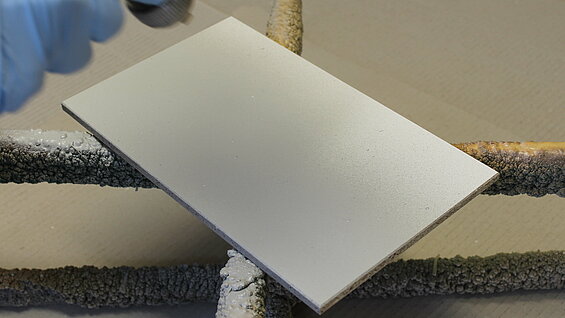
The HYDRO concrete effect makes it possible to create surfaces that are deceptively similar to real concrete, even in the long term. Almost all substrates can be coated with concrete effect and the effect does not require the addition of cement powder. There are no limits to the appearance of the desired effect. The HYDRO concrete effect can be painted, filled and manually finished. Workpieces can be painted that would be difficult to produce with real concrete and are also much lighter. With this effect, every surface becomes an individual and high-quality unique piece.
Fields of application : Interior fittings and furniture
How to HYDRO Concrete effect
How to HYDRO Concrete effect
Practical suggestions:
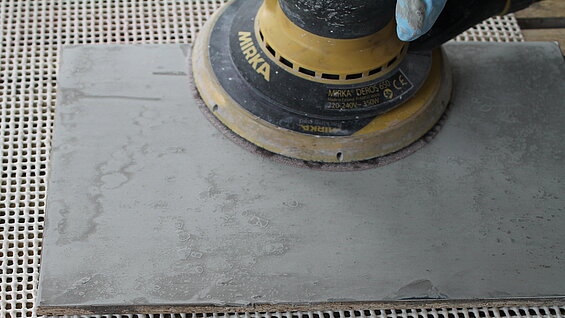
- Sand the selected substrate material well (e.g. FPY or MDF priming foil or melamine-mastic foil). We recommend sanding with 150 - 240 grit. Depending on the desired effect, we recommend using an initial primer on bare MDF surfaces and edges in order to achieve an homogenous base. The drying time for this primer coat is ideally overnight at 20 °C room temperature. Then sand with 280 - 400 grit directly before further coating.
- Depending on the chosen pigment filler, add up to 5 % Additive for brush application HZ 71 to obtain the desired thick-flowing application consistency. Approximately 5 % Colour concentrate for HYDRO lacquers HF G1651 can be added to achieve a particularly authentic effect. Mix in this additive with a stirring stick until it is homogeneously distributed. Please ensure that no air is incorporated into the lacquer if you use an electric mixer; therefore set it to slow (exception: see under hints and tips)! Then add the relevant prescribed hardener and also work it in well.
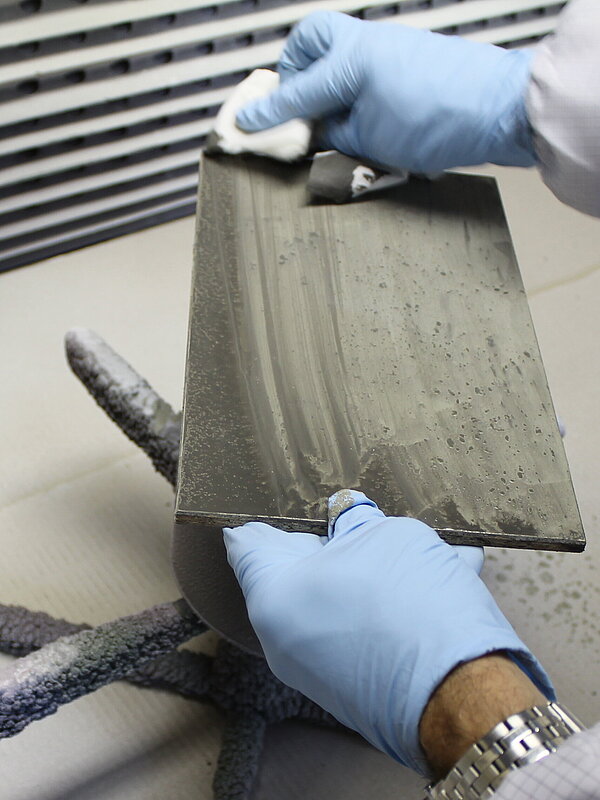
- Apply the prepared filler mixture either copiously with a cup gun or directly onto the substrate material using a spatula and if required work it for the desired effect after a short drying period using the spatula, a brush or any other tool.
- Then maintain a drying time of at least 16 hours at around 20 °C room temperature (depending on the pigment filler used and the coat thickness applied maybe even longer!).
- Sand the surface for effect. Work with circa 320 grit for smooth surfaces and correspondingly coarser sandpaper if rougher surfaces are desired.
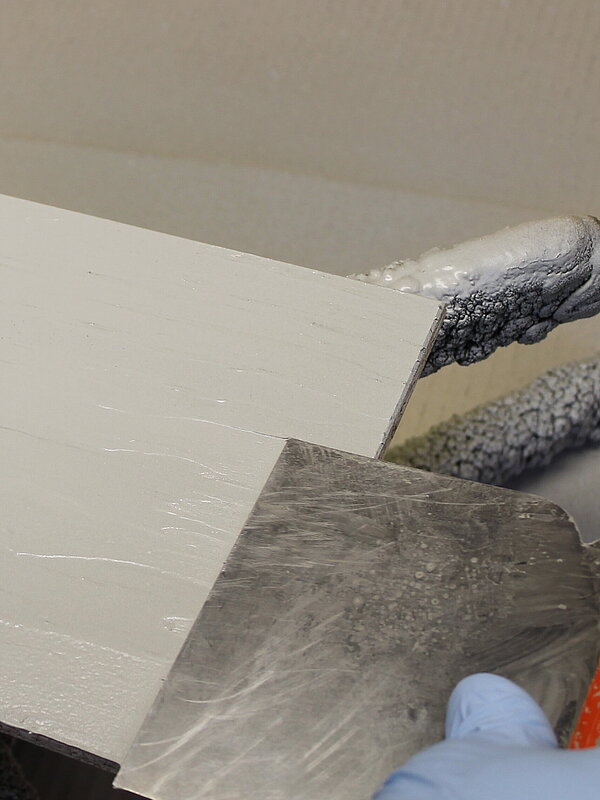
- After removing the sanding dust, use a cup gun to spray sufficient Colour stain BC 85-22881, which has been specially formulated for this method of working, that after a brief reaction time the excess can be removed from the surface with a cloth and the desired effect can be developed. The patches where more stain remains on the surface will later appear darker than the patches where more stain was removed.
- After drying the stain for at least 1 hour at 20 °C room temperature the top coating can be applied to the surface. To do this preferably use either PERFECT-TOP HDE 54002, mixing ratio (by volume) 10 : 1 with HYDRO Hardener HDR 5091 or PERFECT-NATURA HDE 54500, mixing ratio (by volume) 10 : 1 with HYDRO Hardener HDR 5091.
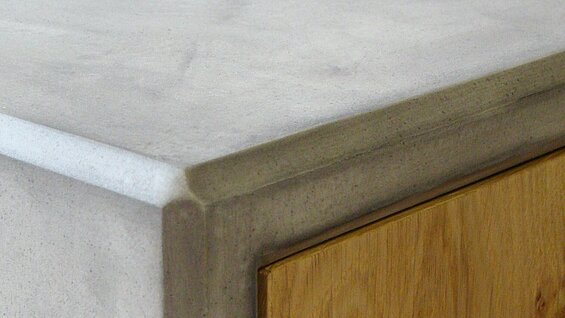
What distinguishes the concrete effect?
What distinguishes the concrete effect?
Here’s a detailed view of the finished surface.

Technical Information HYDRO Concrete Effect
Products required
Note
Please observe the latest technical information and material safety data sheets of the individual products listed. Special instructions: PU varnishes should not be processed and dried at material and room temperatures below 18 °C. To avoid adhesion problems, PU lacquer surfaces should be freshly sanded before the Finish is applied.
Attention: Please note the exact hardener and thinner additions in the following information.
NoteThe information provided is of an advisory nature and is based on the best of our knowledge and careful research according to the current state of the art. A legally binding character cannot be derived from this information. Please also refer to our terms and conditions. Material safety data sheet according to Regulation (EC) No. 1907/2006 is provided.
Contact partner